Getting Started
First Review
A practical walkthrough for creating a project, adding Azure access, running a review, and downloading the report.
Run this flow to get from an empty workspace to a completed review and downloadable report.
Do this
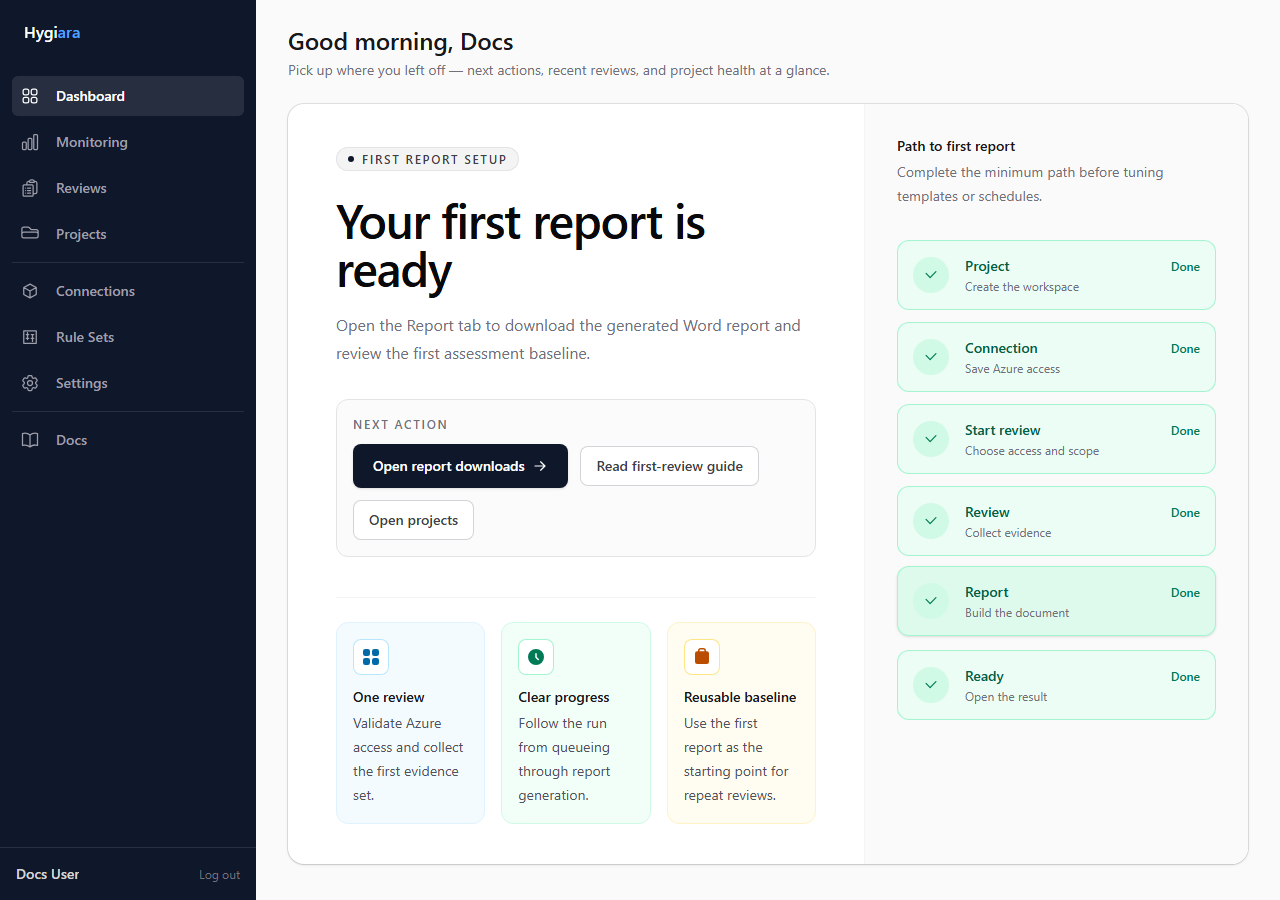
1. Start from the dashboard
Use the dashboard guide if the workspace has no completed reviews yet.
2. Create the project
Create a project for the client, business unit, or Azure estate being reviewed.

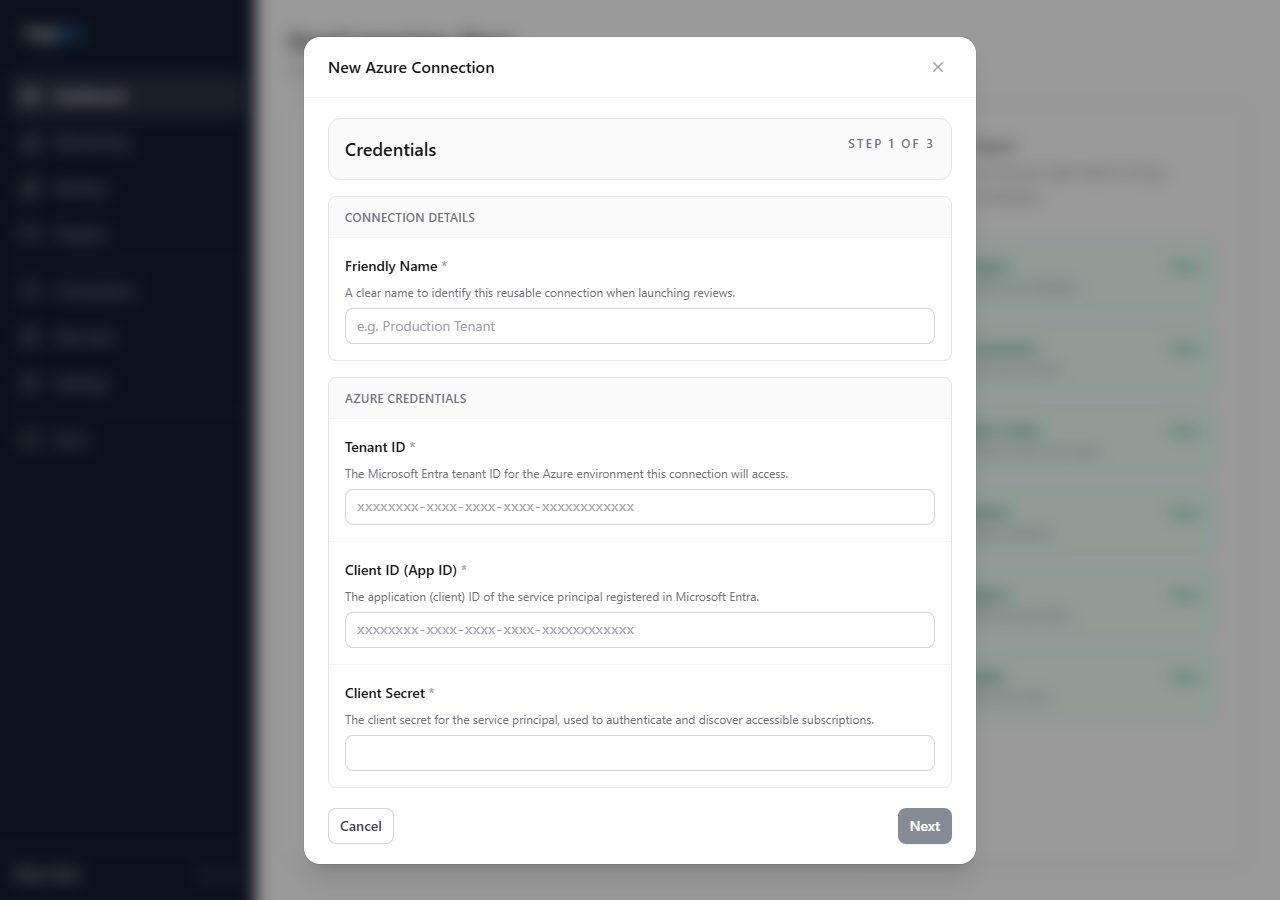
3. Add Azure access
Use a saved connection for repeat work. Enter the tenant ID, client ID, and client secret, then validate that Hygiara can see the expected subscriptions.
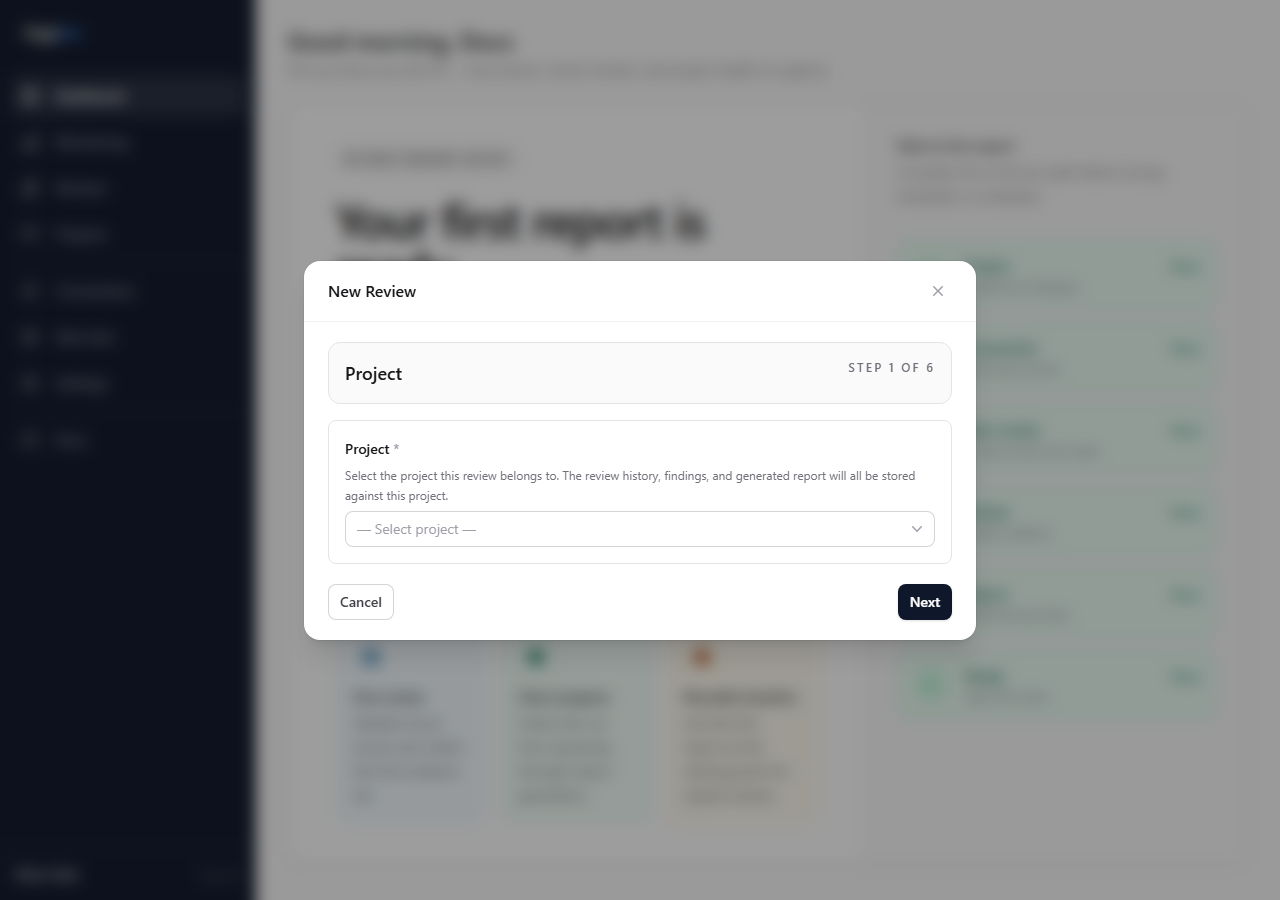
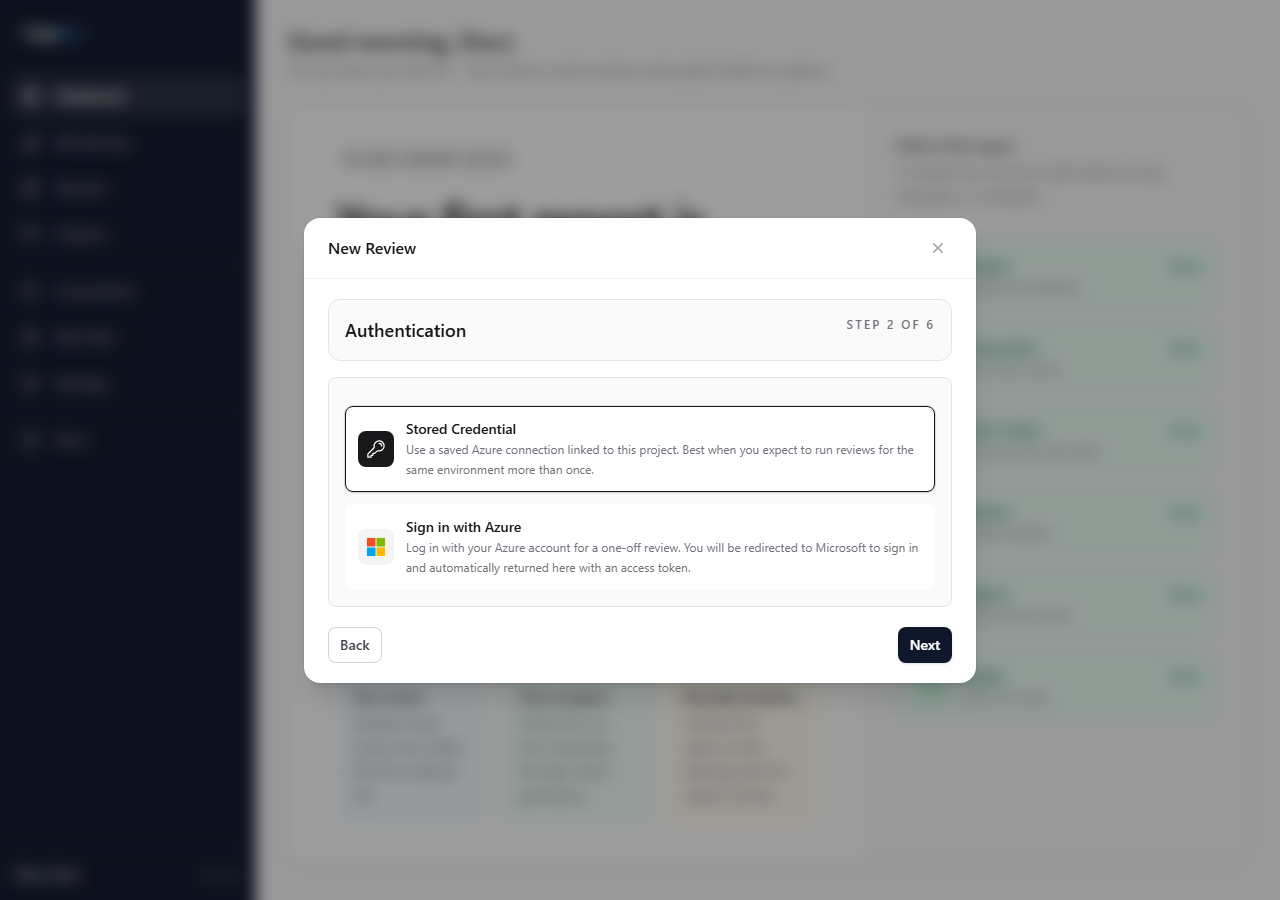
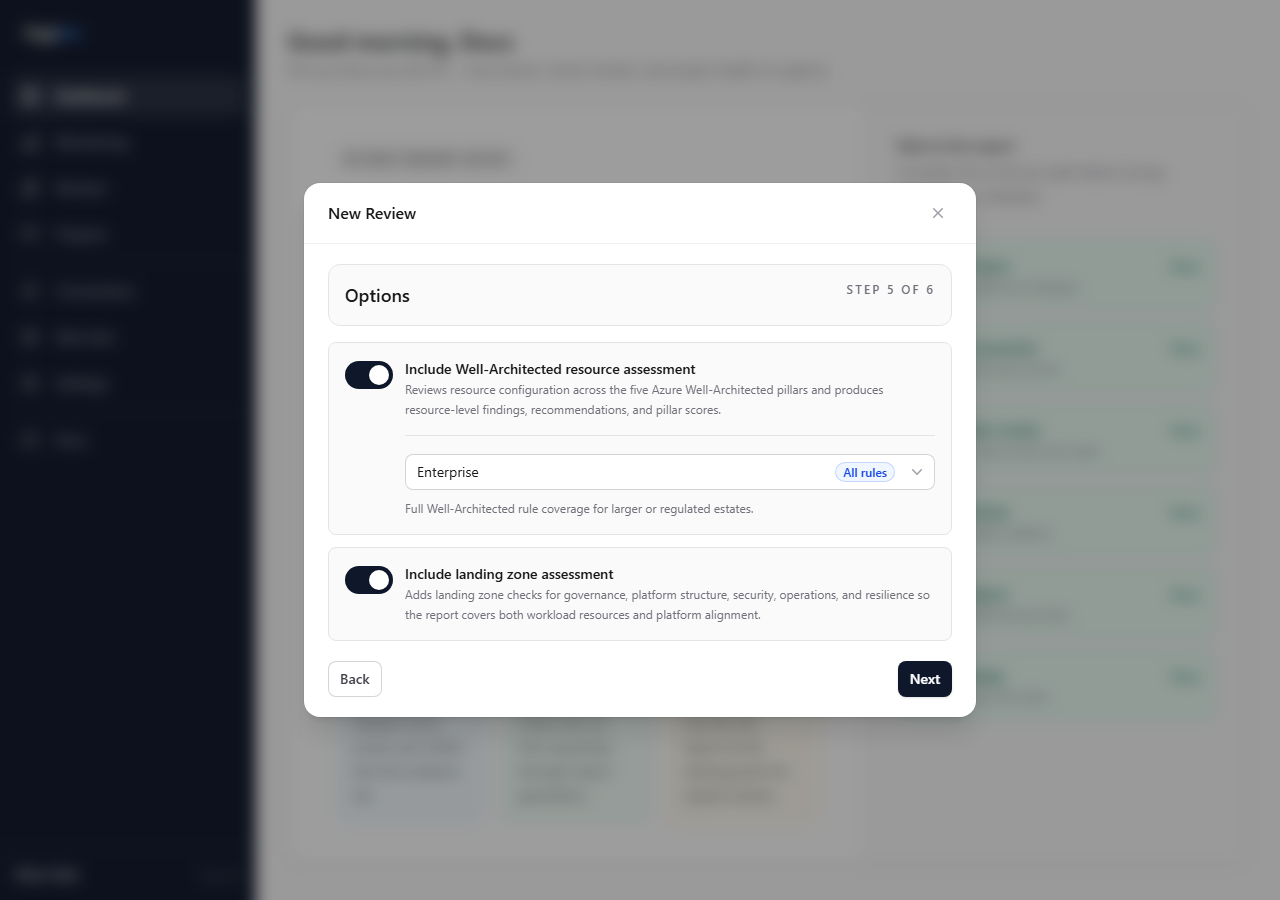
4. Start the review
Open the New Review modal, choose the project, select the access method, and configure review options.
5. Check the completed review
When the review completes, confirm the scope and scan outputs before downloading anything.
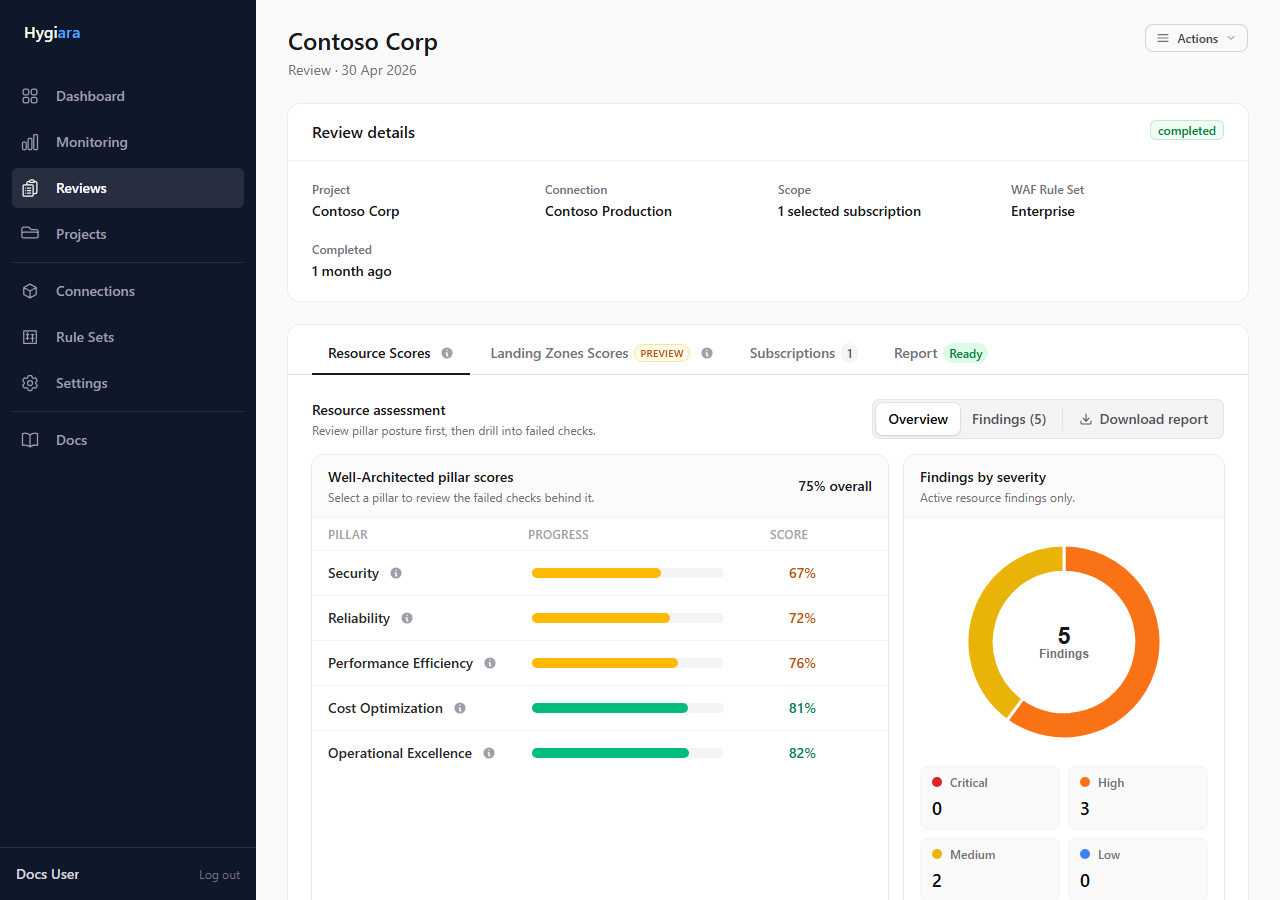
Use Resource Scores for the Well-Architected findings.

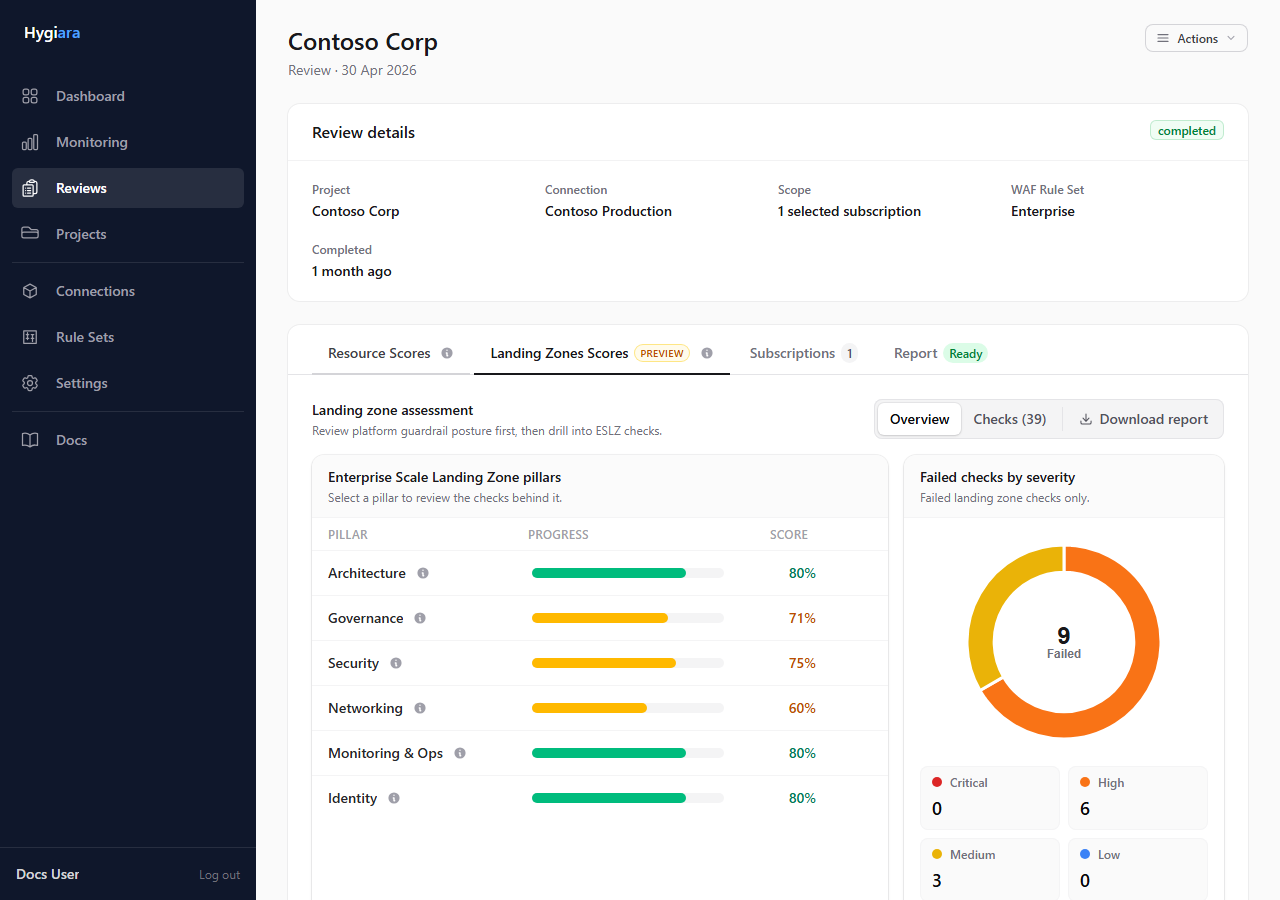
Use Landing Zone Scores when that assessment was enabled.
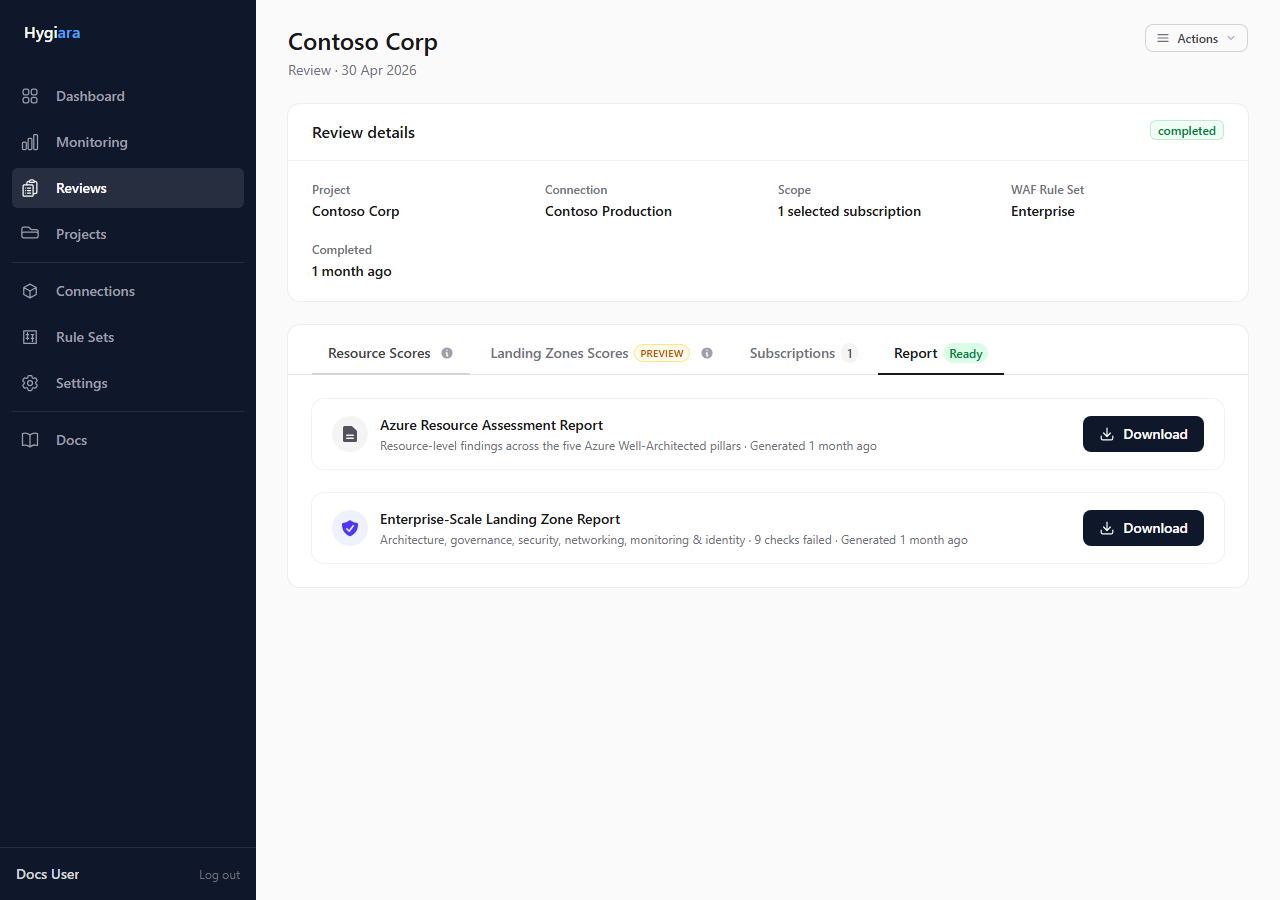
6. Download the report
Open the Report tab and download the generated report files.
Check the result
You should have:
- one project
- validated Azure access
- a completed review with the right subscriptions
- findings and scores visible on the review page
- at least one downloadable Word report
Avoid
- accepting subscription scope without checking it
- enabling Landing Zone assessment without enough management group visibility
- sharing the report before opening it and checking the generated contents